It seems like the only time that a button breaks is when you don’t have time to take it to a tailor to get it fixed. I was traveling at a convention in Dallas a couple of years ago, and I was buttoning up my dress shirt, getting ready for a networking dinner. I was fastening the top button (because I had to put on a tie), when it split in half. I wasn’t going to be able to get away with that look where you unbutton the top button but still wear a tie — because that casual look just wouldn’t work.
It was the last day of the convention, and my other dress shirt still smelled like the bar where we ended up two nights ago. So I buzzed down to the front desk and asked if an emergency sewing kit was available. A helpful bellhop brought one up just a few minutes later, and I sat down to get to work. I detached one of those spare buttons down near the bottom of the shirt (that’s why they are there), pulled out the thread fastening the fractured button to the shirt, and got to work. About 10 minutes later, I was all dressed and ready to go downstairs.
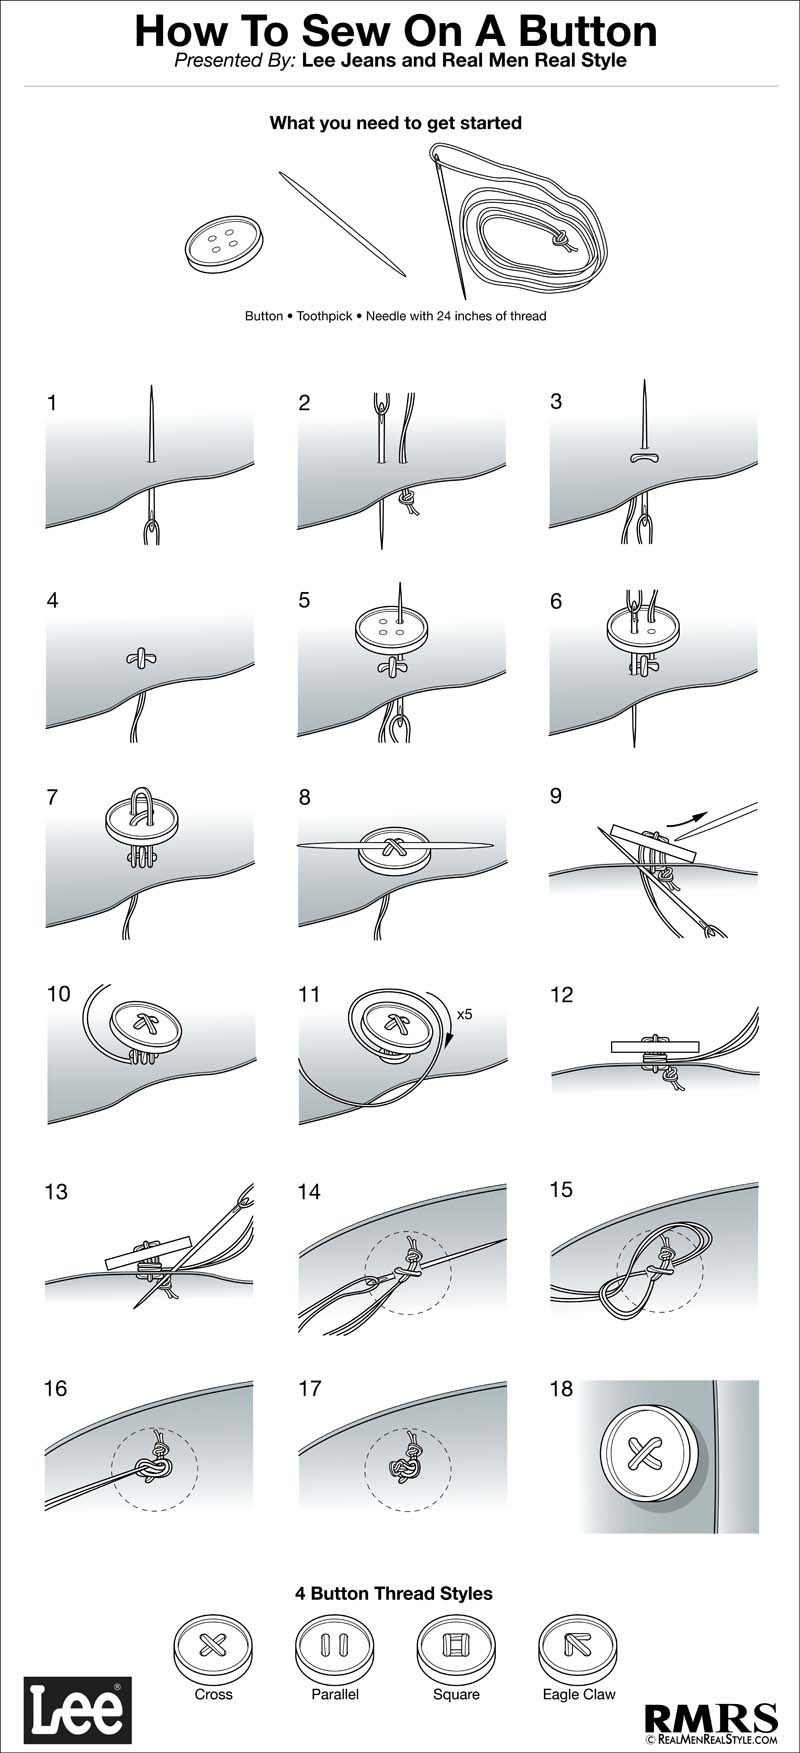
Luckily, my mother showed me how to sew on a button. You can learn how to do it too — it only takes five short steps to go from no button to button perfection.
What You Need
Contents
What do you need? One needle — but two needles work better. Get the thinnest needle you can find. You’ll also need about a foot of thread. If you decide to double over the threads, which makes a stronger attachment and actually makes tying the knots easier, you’ll need two feet. Pick a thread that is as close to the color of the shirt or other garment as possible. Get a button that matches the original or at least makes a close facsimile. You’ll also need something to cut the extra thread. Scissors or even a knife is ideal, but you can also bite the thread off if you have nothing else. Remember — if you’re at a hotel that caters to business travelers, the front desk will likely have some emergency sewing kits on hand. But it’s even better if you have an emergency kit with you when you go on the road.
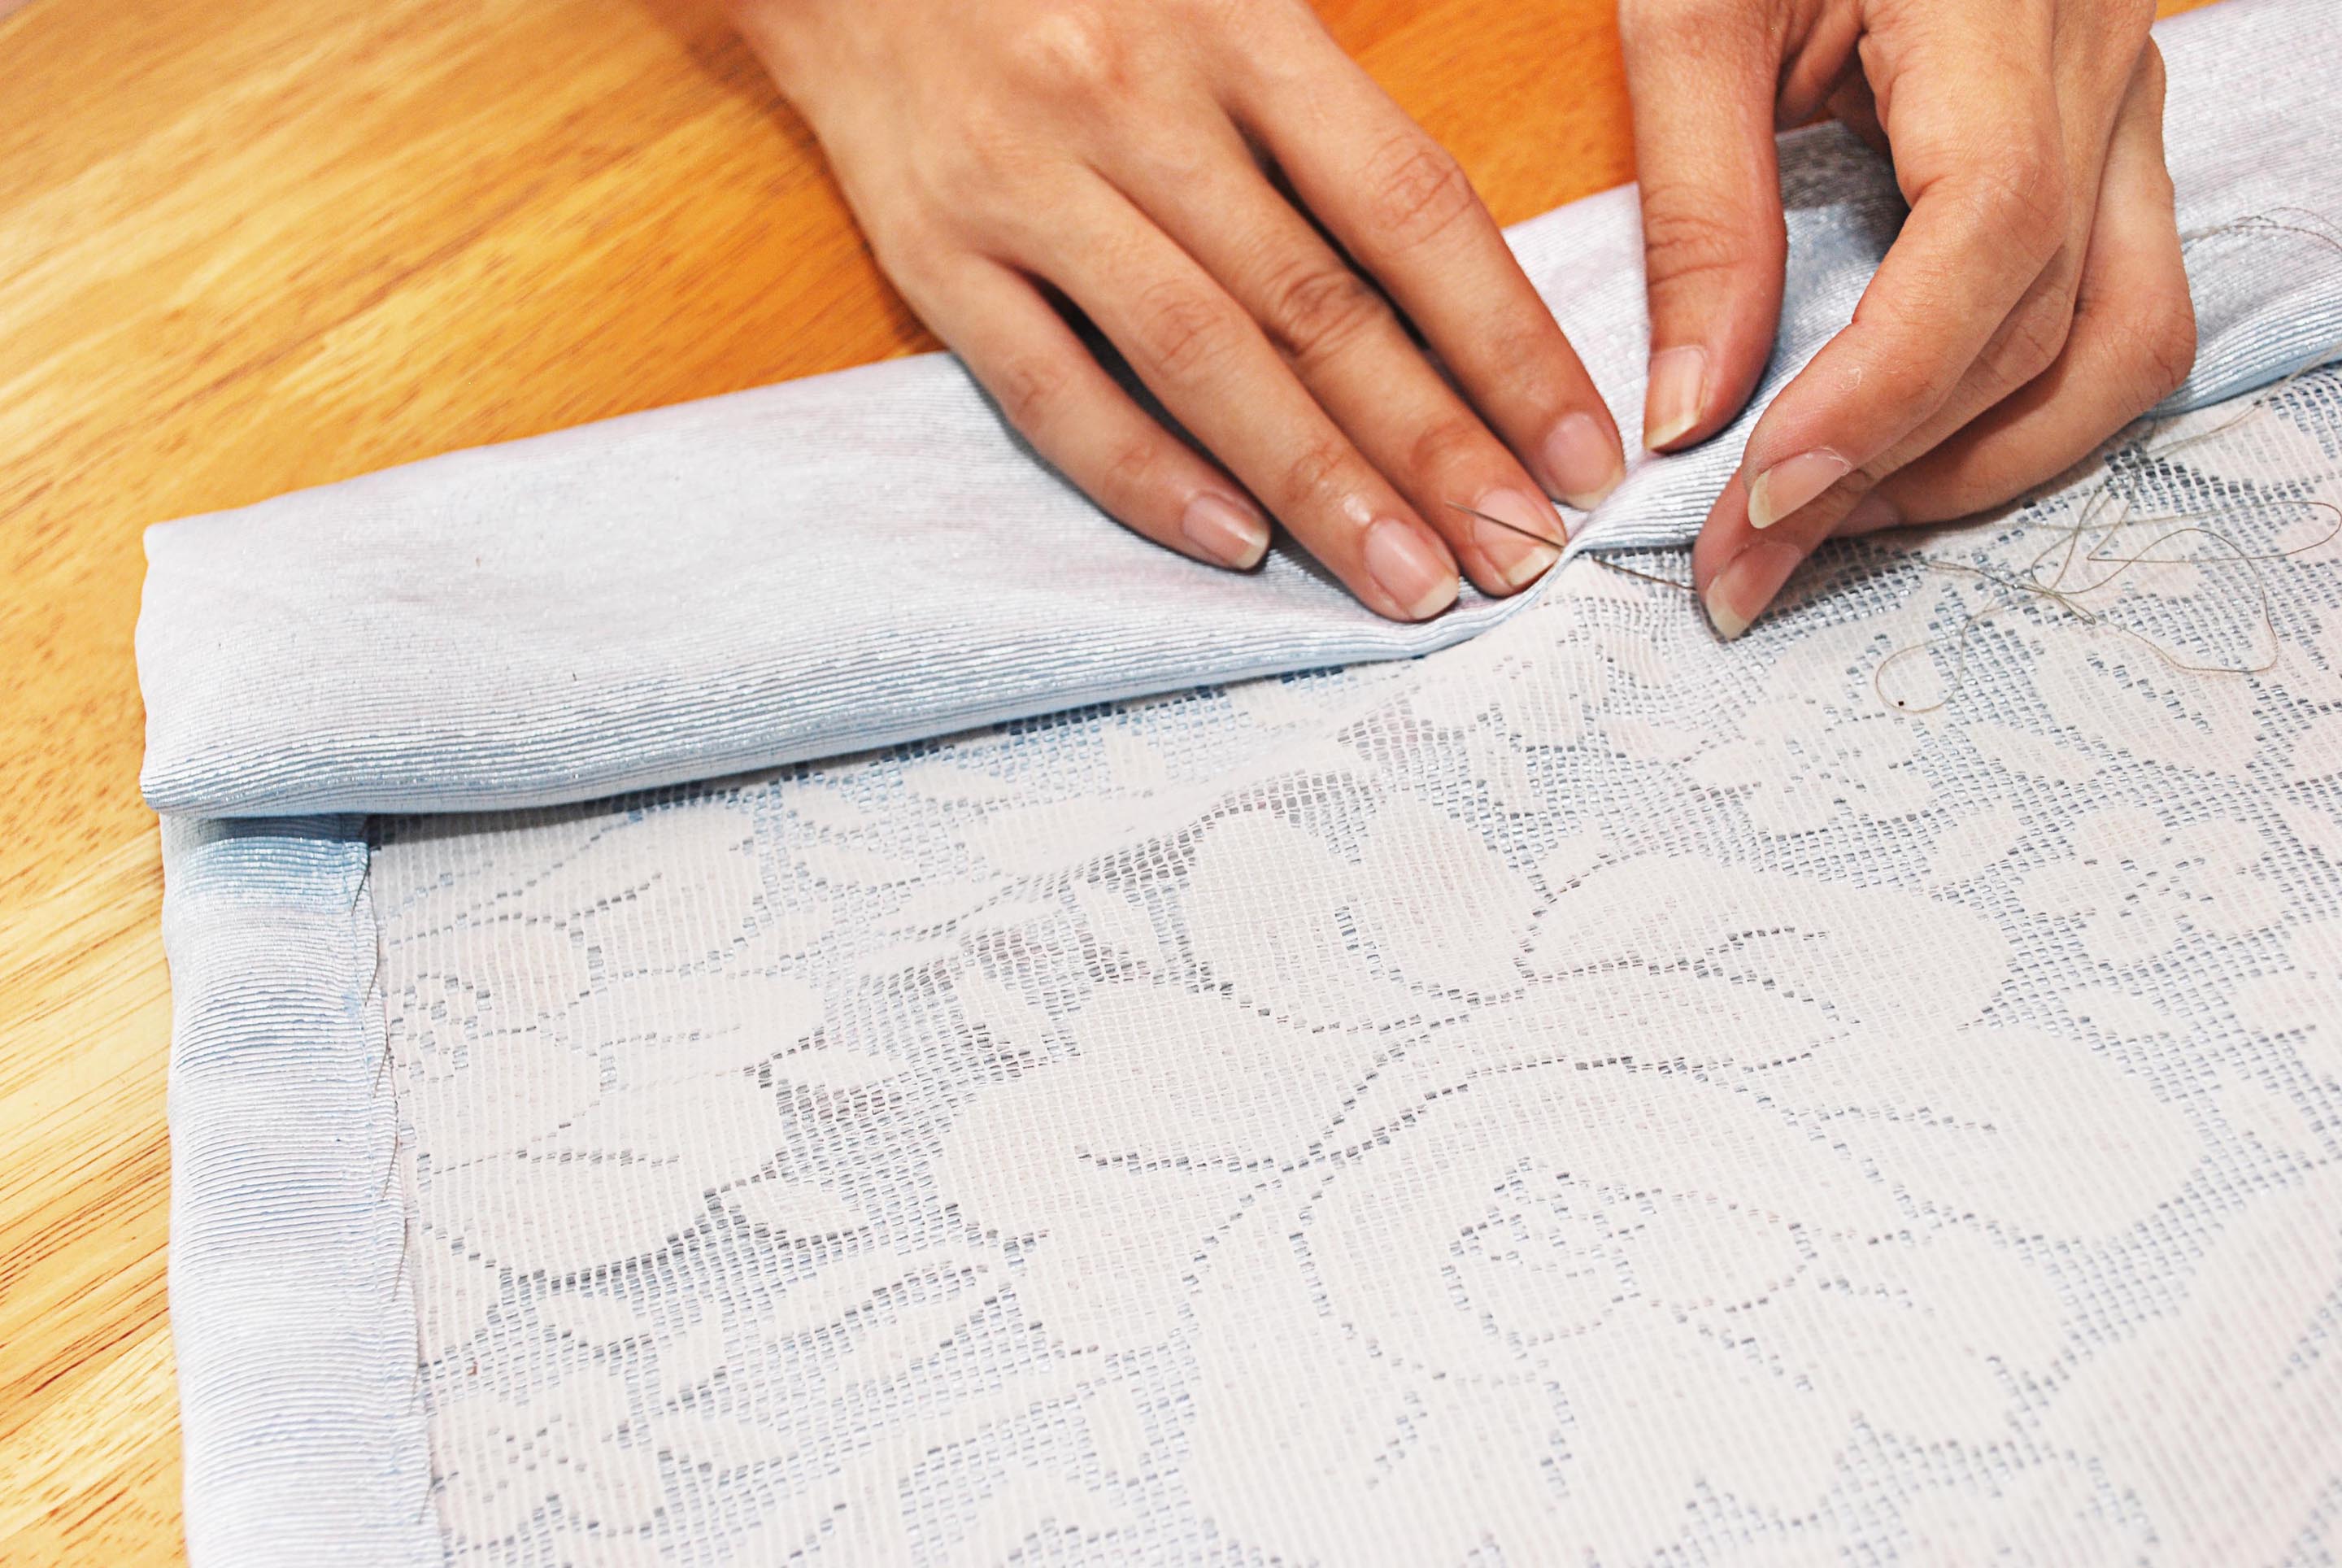
Thread your needle and get your knot going.
Moisten the end of the thread in your mouth, and then slide it through the eye of the needle. If you have two feet, get equal amounts on either side. If not, give yourself at least in inch of slack for tying the thread off. If you don’t have two feet, wrap your thread around your index finger a couple of times. Use your thumb to turn those loops into a close bundle, and then slide the loops off your finger. Grab those with one hand and pull the long end of your threat tight with your other hand. You should have a tight knot that will be your first anchor to keep the threat in place.
Make your anchor point.
Push the needle through from the back of the fabric to the front where you will put the button. Then turn the needle around and go through to the back, and one more time to the front again. The purpose of this is to create an “X” where you will center the button. This keeps the thread from loosening if the button undergoes stress.
Set the button on the “X” and push the needle from the rear to the front of your garment through one of the button holes. Pull the needle all the way through until the knot comes tight against the back of the fabric. Hold the button in place with a fingertip while you turn the needle around and go back through the hole opposite the one you used before. Push the needle all the way through and pull the thread secure. Now you should see one line of thread linking the two holes.
Make the shank.
After you’ve repeated the threading part of Step 3 several times, come up again through the back of the fabric, but don’t go through the button hole again — instead, turn the needle and come through the fabric but out to one side of the button. Use the needle to bring thread around the threads coming through the fabric, making six loops. Make this tight and then push the needle back down through the fabric.
Tie it all off.
Form a small knot on the rear of the fabric, either by pushing the needle through a knot or cutting the thread off and using the slack to make a knot with your fingers. Make sure the knot fits snugly against the rear of the fabric. After you have tightened the knot, cut off any excess thread. Now you’re ready to go!
Looking for the best sewing machine for beginners? Click here